Wednesday, July 26, 2017

Ground Turkey Meatloaf


I shunned meatloaf for years – so old fashioned, so unhealthy. 

But I really like the idea of the cute, self-contained loaf that includes the goodness of protein and flavor. Plus, I have fond memories of my mother eating cold meatloaf sandwiches for lunch and I wanted to channel her with my own, updated version of the iconic American classic.  Enter the ground turkey meatloaf.

I use healthy, 99 percent fat-free ground turkey and moisten it with plenty of finely chopped mushrooms for a burst of umami flavor. Chopped jalapenos -- which you can now buy in a jar from the grocery aisle that includes pickles and hot dog relish – add another dimension for those who like heat. Substitute finely chopped broccoli if you prefer to eat lower on the scoville heat scale.

What I especially like about meatloaf is its forgiving nature. Precise measuring of ingredients is not necessary for success. One egg to one pound of meat is typical, but other binders, such as ½ cup of panko or stale bread crumbs are optional, as are chopped onions or garlic. Fewer crumbs result in a denser loaf, while more give the loaf a lighter texture. Anywhere from ¾ to 1 cup of finely chopped mushrooms add meaty flavor, and about ¼ cup of chopped jalapenos adds spiciness. Salt and pepper are essential, and any number of dried herbs work well with turkey. 

Traditionalists like a generous coat of ketchup over the top of the loaf before it goes into the oven, but as with other ingredients, this one is optional. I think that ketchup masks the savory, deep flavor of this meatloaf, but if you love the stuff, pour it on.

You can buy double-formed meatloaf pans with holes punched in the bottom of the first pan to allow the fat to drain while the loaf bakes. Or, make your own version of a double pan by placing the loaf in a disposable aluminum foil pan with holes punched in the bottom and set that pan inside another baking pan. I use one plain loaf pan since the ground turkey doesn't produce enough fat to bother with the double-pan system.

Here’s my current favorite version of the American treasure:

Ingredients:
1 pound ground turkey
1 egg
½ cup panko bread crumbs
1 cup finely chopped mushrooms
1/4 cup finely chopped onions
1/4 cup chopped jalapenos
3 cloves minced garlic
½ teaspoon salt
¼ teaspoon pepper
1 teaspoon unsalted Italian herb blend

Directions:
1.       With clean hands or a wide-tined fork, mix all ingredients together in a large bowl.

2.       Press the ground meat mixture into a loaf pan and smooth the top.

3.       Bake the loaf in a 350 degree Fahrenheit oven for about 45 minutes or until a meat thermometer registers 170 degrees Fahrenheit.

4.       Let the loaf rest for 5 minutes, allowing it to set. Run a knife around the edges of the pan if it hasn't already pulled away from the edges, and invert the loaf onto a plate or platter to make cutting it easier.

Sunday, October 11, 2015

Chicken and Apricot Enchiladas


They take a bit of time to prepare, but enchiladas give you warmth and comfort on a cool fall day. As always, I use refrigerator and pantry staples and leftover bits of vegetables. Here's a post on enchiladas from a few years ago, and I see that my comments about always using black beans is actually not true. 

Ingredients: 
For last night's enchildas, I used a chicken breast (poached and shredded), goat cheese, leftover cooked spinach and 3 dried apricots for each enchilada. You could of course substitute Mexican cheese or Monterey Jack for the goat cheese and add black, pinto or Great Northern beans in addition to the chicken. Sometimes I also add a tablespoon of chipolte chiles in adobo sauce for smoky heat.

Sauce: 
My sauce consists of a roux with 3 tablespoons of flour and about 2 1/2 to 3 cups of chicken stock along with a canned of chopped green chilies and a few tablespoons of salsa. When I use flour tortillas, as I did last night, I don't bother to warm the tortillas or dip them in the sauce because they are plenty pliable as is.

Assembly: 
Once I have all the ingredients on hand, I create a mini assembly line, placing the fillings on one side of the tortilla. Assembling the enchiladas all at the same time before rolling them up allows me to adjust the fillings so each tortilla contains the same amount. 

Cooking: 
Before rolling up the enchiladas, spoon a few large tablespoons of sauce onto the bottom and sides of the baking dish to help keep the enchiladas from sticking to the pan. Begin rolling from the side containing the filling; When you get to the end of the tortilla, pull the remaining flap of tortilla up to the top of the roll so you can lift it easily and place it flap-side-down in the baking dish. The tortillas bake at 350 degrees for 45 minutes -- covered for soft tops and uncovered about 1/2 way through for a more crispy top.


Last night, the enchiladas rested on a bed of chopped kale and spinach salad mix, topped with sour cream (low fat of course!) and guacamole with pomegranate seeds. Roasted sweet potatoes rounded out the meal.


Saturday, October 10, 2015

Trout -- Quick, Easy and Clean!


Trout and hamburgers are my go-to choices when we eat out on road trips because I can always count on them to taste great. What's more, most trout in restaurants or in the grocery store are farmed rainbow trout, which the Monterey Bay Aquarium's Seafood Watch program says are always a "Best Choice" pick. And they're so easy to cook!

My grocery store sells whole trout and filets them for me in minutes. I find that one large trout serves 2 people (plus, 2 fillets fit perfectly in my 12-inch skillet).

You'll need a few pieces of equipment--one special and one probably improvised:

 --A pair of fish tweezers, which I've posted about before, come in handy to remove the few remaining bones that your fish guy will inevitably leave in. I find fish tweezers very cool!

--You'll need to find a cover for your large skillet. I use a round pizza pan, but you may have a large lid from a stock pot or spaghetti pot. Or, simply use a piece of foil. Covering the fish allows it to cook quickly and, maybe more importantly, keeps you from having to clean a bunch of greasiness from your stovetop.


Here's my fool-proof and quick method for cooking trout:

1. Pour a bit of oil in a pan heated to medium high and lay the trout in the pan skin-side-down.

2. Cover the pan and let the fish cook for about 4 minutes.

3. The trout is done when it flakes easily after you poke it with a fork or the tip of a knife and when the flesh is no longer shiny and glistening (cooking sites call this stage opaque--meaning that the flesh is not see-through)

4. Squeeze a bit of fresh lemon juice and add salt and pepper on each piece, and use a metal spatula to serve the fish onto each person's plate,

I don't eat the skin (of any fish actually) because I never cook it to the stage where it's crispy enough to be delectable and because for some fish, like salmon or halibut, I fear the mercury that resides in the fatty portions of the fish.  The topic of eating fish skin is debatable--scroll through this Serious Eats post for the pros and cons of eating fish skin!


With the trout, we had roasted potatoes with a bunch of chopped scallions tossed in after roasting (toss the potatoes in oil, salt and pepper and roast at 400 degrees for about 25 minutes, turning them once) and a salad with my typical melange of this-and-that, including leftover cooked mushrooms, 1/2 of a left-over avocado, slices of red onions, a bit of blue cheese and some toasted walnuts.


Tuesday, September 29, 2015

Pizza and a Salad -- A Perennial Favorite


The Pizza

I've posted about making pizza before but I have a few changes/improvements in my method--not earth-shattering new techniques, but things I need to remember to do that really improve the outcome:

1.  Drizzle olive oil directly on the pizza before putting it in the oven.

2. Always add salt and pepper in generous amounts.

3. Put the pizza pan on the lowest oven shelf to cook. This way, the pizza cooks with a perfectly crisp bottom in about 20 minutes at 425 degrees Fahrenheit. I stopped using my pizza stone and actually gave it away on one of my newest obsessions, the Buy Nothing Project website for my town. (Having to put the pizza stone in the oven way ahead of time to heat for 30 minutes was something I couldn't be bothered to do!)


The Salad

Sometimes I like a perfectly plain lettuce salad with pizza, dressed only with oil, vinegar, salt and pepper. But tonight I had some extra ingredients on hand and had a salad as interesting and varied as the pizza. If you look closely, you'll see fresh kaleRomaine lettuce, olives stuffed with garlic cloves (delish!!), roasted red pepper, red onion slices and toasted sunflower seeds.


Monday, September 28, 2015

Mushroom and Goat Cheese Omelet


An omelet -- my go-to dinner when we return from a road trip, when we need a quick meal or when I just can't think of anything else to cook.

Eggs, mushrooms and some sort of cheese (frequently goat cheese, as pictured here) are always on my twice-a month large shopping list, but I'll toss in any left-over vegetable (broccoli or spinach in particular work especially well), and if I'm ambitious, I'll roast a red pepper to add too. Chopped parsley, cilantro or chives give the omelet a fresh contrast with the creamy mushrooms and cheese. 

Don't forget salt and pepper!

Over the years, I've perfected my technique. Here's my plan for about 6 eggs to serve 2 people:

1. Cook the sliced mushrooms. About 4 to 5 large mushrooms work for a 2-person omelet.

2. Stir the eggs with a few tablespoons of milk (I use soy because I like its creaminess).

3. Pour the eggs in a large (12-inch) skillet, with a tablespoon or two of oil, preheated to medium.

4. Let the eggs slightly set for a minute or two, then start tilting and shaking the pan to spread out the egg mixture.

5. In a few more minutes, use a silicon spatula that is OK with high heat to lift the edges of the omelet all around the pan, one edge at a time, and tilt the pan so the runny mixture fills in the gap where you've lifted.


6. Once all the runny part of the mix is underneath continuing to cook, sprinkle your toppings on half of the omelet

7. I then use the spatula or a knife to cut through the untopped half of the omelet into 2 sections (one can be larger than the other to account for different appetites. This procedure allows me to fold over only half of the omelet at a time, helping to ensure that my folding goes smoothly.

8. Fold each piece of the untopped omelet over its topping, turn off the heat and let the omelet sit for a minute or two so the fillings warm up.

9. To serve the eggs from the pan, finish cutting through the omelet where your top cut was and serve each portion separately.

Saturday, September 26, 2015

Eating Alone -- The Pleasures of Eggs


I'm lucky not to eat alone most nights, but when Don is off sailing or visiting his brother or some-such errand, I relish the opportunity . . . to have hard boiled eggs for dinner.


The eggs, cold toast (so the butter doesn't melt don't you know), and a hodge-podge of miscellaneous foods scrounged from the fridge or cupboard make the perfect dining alone meal. Sometimes the add-ons include a few carrot sticks or a salad. Dessert might be a handful of gorp made with chocolate chips and toasted nuts, a few dates stashed away in a cupboard, a bowl of Cheerios (with or without milk), a tortilla topped with peanut butter, or a bowl of popcorn; Or, if I'm feeling particularly hungry, I'll have an assortment consisting of all of the above.

I also love to have a glass of wine in a small juice glass instead of a wine glass -- it reminds me of eating at my Portuguese grandmother's house where we drank from little glasses with pictures of horses on them.


Ever since I came upon the recipe for hard boiled eggs from Cook's Illustrated, my eggs come out perfectly every single time. It works this way:

1. Put the eggs in a pot with cold water.
2. Once the water boils,remove the eggs from the heat, and set your timer for 12 minutes. 
3. Plunge the eggs in a bowl filled with water and ice cubes for a minutes or two. 

Alone in the Kitchen with an Eggplant: Confessions of Cooking for One and Dining Alone


There are some wonderful books about eating alone. Check out  "Alone in the Kitchen with an Eggplant: Confessions of Cooking for One and Dining Alone," by Jenni Ferrari-Adler and "What We Eat When We Eat Alone: Stories and 100 Recipes,"  by Deborah Madison and Patrick McFarlin.


Cauliflower Soup and Spinach Salad


Cauliflower soup transforms ordinary -- and let's admit, sometimes strong-tasting cauliflower -- into a silky delicious fall or winter soup. This soup gets it's luscious buttery color from a few carrots cooked along with the cauliflower and a dash or two of curry powder.

As you can see, I'm a fan of using an abundance of cilantro  as garnish.

I'm also a fan of adding virtually any left over fruit or vegetable into salads, and spaghetti squash works surprisingly well with spinach. Warm croissants or crusty bread of any sort round out the meal.


Cauliflower Soup for 2 people

Cook a small onion in a tablespoon of oil until it's soft.

Add 2 cups of chicken broth, half a head of cauliflower and a few carrots, cut into chunks.

Simmer the soup until the vegetables are soft. Let the mixture cool for a few minutes before adding it to a blender and pureeing it until it's completely smooth. Fill the blender only 2/3 of the way full and keep a tight grip on the lid with a dishtowel or pot holder so the hot liquid doesn't explode.

Pour  the mixture back to the pot, add 1 cup of soy milk (for creaminess) or whatever mix of milk and cream you prefer, and reheat the soup just until hot. Cream helps keep the soup with milk from curdling if you over heat it.

Don't forget salt and pepper and a dash of curry powder it you would like. Garnish with either chopped cilantro, parsley or a few fresh thyme leaves.


Spinach Salad With Spaghetti Squash


Perfect for fall, spaghetti squash has lots going for it. High in nutrition and low in calories, spaghetti squash isn't as heavy as other winter squashes, and it's just fun to scrape out the bright yellow flesh with a fork after the squash is cooked and cooled.

I had a bit of squash that hadn't fit in my pan when I recently cooked spaghetti squash hash, so I cooked the remaining piece (about 7 minutes in the microwave) and tossed it into the salad -- it tends to clump slightly, but that's OK.


I particularly like thin slices of red onion and toasted walnuts (whole or in large pieces) in spinach salads, as well as a bit of crumbled feta or goat cheese if I have it on hand.

Friday, August 28, 2015

Ground Turkey Lettuce Cups


I don't make this very often, but it's so fresh-tasting -- especially when the weather's warm -- that I really should make it more.

Leftover turkey was in the fridge (but not enough for turkey burgers); I wanted to finish up a jar of peanuts so I could use the jar for something else; and I had a head of butter lettuce from a recent shopping trip. Voila -- turkey lettuce cups.

Shredded cabbage, grated carrots, some pickled ginger and a bit of parsley (wish it had been cilantro) filled out the mixture. I seasoned it with lime juice, soy sauce and a splash of fish sauce. ( I recommend that you buy a small bottle of fish sauce instead of the large, economical size, because a little goes a long way!) I think you could also put in a few garbanzo beans, or make it vegetarian by just using whole and smashed garbanzos.

The trickiest part for me is making sure that the lettuce leaves dry out completely after I wash them--patting again and again with a paper towel does the trick.

And the second trickiest part is eating -- best to use only the largest leaves from the head and to fold the cups burrito-style by folding the bottom up and then wrap the leaves around. They are on the messy side if you're not careful, but it's a small price to pay for the treat.

Tuesday, December 13, 2011

Pomegranate Seeds—A Wintertime Treat


 A few years ago I learned about the almost magical method of getting the seeds from pomegranates by conducting the entire process with the pomegranate immersed in water. And now, I buy them from the first time I see them in grocery stores in the late fall until the last ones disappear from the shelves in January -- store them in the fridge, or, like pineapples, they'll go bad quickly at room temp.
The seeds are a wonderful addition to guacamole.  (Trust me, it’s true!) When I make a chocolate pudding cake, I like to sprinkle them alongside for a great contrast in flavor and texture. Occasionally I also add them to brown rice pilaf along with chopped apricots and toasted almonds or pecans, butter, salt and pepper.

I know that many cooks add pomegranate seeds to green salads, but I find it annoying that they fall off my fork so easily.  Karen Page and Andrew Dornenburg, authors of “The Flavor Bible,” recommend a long list of parings, to include: almonds, beets, chicken, cinnamon, fish, ginger, grapefruit, hummus, lamb, roasted meats, parsley, vinegar and walnuts.
My favorite and most frequent use for pomegranate seeds is as part of dessert. Mostly I simply toss them on top of fruit and add a dollop of yogurt (or ice cream if we’re being decadent). And when I haven't gone to the grocery store to get  fresh fruit, we simply have a bowlful of pomegranate seeds along with the yogurt.  I occasionally finish the dessert with a sprinkling of either toasted coconut, granola, brown sugar or honey. (Toast coconut in a 350 degree oven for 6 minutes or so to intensify its flavor and give it a crunchy texture.
Here’s my listing of fruit at goes well with pomegranate seeds. Note that the pairing works well with just about any fruit.
Fresh or baked apples
Sliced bananas
Cooked bananas (Don’t forget the chocolate chips.)
Kiwi
Diced oranges
Fresh or baked pears (I microwave pears for just 2 minutes when I’ve forgotten to put them in the oven.)
 
How to Seed a Pomegranate:
                                         
1.   Fill your largest mixing bowl or your salad spinning bowl with lukewarm water (lukewarm only so your hands don’t get cold). I like to place the bowl in the sink so I can easily discard the peel next to the bowl.
 
2.   Cut the fuzzy top off the pomegranate but not so deeply so as to cut into the fruit.
 
3.    Score the pomegranate into quarters.


4.    Pull the quarters apart under water to keep any juice from splattering, working on small segments at a time and discarding the rind into the sink.  Don’t worry too much about getting all the white pith off the each seed; you can do that later.

 
5.    Swirl the water around, letting the pith float to the top, then scoop up handfuls of seeds and remove large chunks of pith.
 

6.    Repeat step 5 until you have most of the pith removed. Drain the seeds on a clean dishtowel. They will keep well in the refrigerator for up to a week.


Friday, July 15, 2011

Curry with Sweet Potatoes and Tofu


I love to buy pineapples, but with just two of us here I sometimes get tired of it before it's gone. That's where curry comes into the picture. I got this recipe years ago from my sister and I make it sooner or later whenever I buy a pineapple. If you're needing a plant for the kitchen, save the top of the pineapple to root in a jar of water.

We usually have curry with chicken, but last night's version had tofu instead. I also use whatever vegetables I have on hand, cauliflower, red bell pepper, zucchini, green beans, spinach, etc. Last night we had sweet potatoes, broccoli and some dried tomatoes.

Here are the basics:

Cut a block of tofu in half and wrap the half you plan to use in a dish towel to press out excess water. I put a small cutting board over the tofu and put a heavy pan on top of that.

Cook 1 small, diced onion and 2 cloves of garlic in a large  frying pan.

Add 2 T of oil, 3 T of flour,  and 3 T of curry powder. Cook the mixture for a few minutes.

Add about 2 cups of heated chicken or vegetable stock in 1/3 cup increments. Cook and stir until thickened. If the mixture gets lumpy at any point, remove it from the heat and continue stirring until the lumps disappear. Add the liquid just a little bit at a time, stirring in completely after each addition.

Here are the sweet potatoes cooking away.

Stir in whatever vegetables you want to use. Last night we had diced sweet potatoes that I cooked for about 15 minutes before adding 4 broccoli stalks cut into pieces, some dried tomatoes I had on hand, and 1/2 a carton of tofu cut into pieces.

Serve the curry over rice and add condiments. The condiments are actually one of the things I like best about this recipe! We usually have raisins, peanuts, 1 sliced banana, and pineapple chunks. Spoon a dollop of plain yogurt and some chopped cilantro over the top.


Sunday, July 10, 2011

Spinach Salad -- with a Poached Egg and Roasted Sweet Potatoes


My daughter Kate asked her FB friends about the absolute best way to poach eggs so you don't get those ugly, wispy bits of white to mar the picture.

Kate, in her younger days.

If you were cooking for the Queen you could just snip off those bits with a pair of kitchen shears, but we want perfection for the entire cooking process, right?

Of course Kate broke the egg into a cup first, not directly into the water. And yes, she did put a bit of vinegar in the water itself. Yep, she swirled the water as well. Here are some of the FB replies she got that she hadn't tried:

--Let a bit of water go into the cup first and let the egg begin to turn white before finishing sliding the egg into the water.

--Use a bit less water to begin with.

--Poke a tiny hole in the egg and boil it for 10 seconds. Reduce the heat to a slow simmer, and add the vinegar. Scoop the egg out just before you think they are done (Julia says 2 minutes, but others say that is too long) and put them in cold water to rinse off the vinegar.

--Forget about the water and poach the egg in a couple inches or so of salsa with indentations made for the eggs. Cook for 10 minutes.

I must confess though, when it came time for me to poach the eggs for tonight's spinach salad, the only tip I remembered was holding the egg in the cup part way into the water. Maybe I wasn't patient enough, but the egg wasn't turning white at all. Maybe the water wasn't hot enough? Maybe the cup wasn't big enough, or too big? Anyway, my egg ended up with those wispy white bits.  I will give these methods another try next time I need an egg to go on top of something (Kate had hers over polenta).

That said, our spinach salad with sauteed mushrooms, roasted sweet potatoes, feta cheese and a poached egg was really a great dinner (of course it wasn't my own invention -- I saw Antonia put an egg over a spinach salad one season on Top Chef).  If there had been any bacon around the house, I would have added that too (fat chance in my house!).

I made this because 1) I had a carton of spinach that needed to be used, and 2) we really love to order the spinach salad at the TreeHouse Cafe. Their salad has feta, walnuts,  bacon and a warm maple vinaigrette dressing. Don gets a whole salad and I get a 1/2 portion -- it's huge. You really need to try it if you ever visit Bainbridge Island.

TreeHouse Cafe


Pizza and Salad -- Again!

 
We eat a lot of pizza and salads. Not that there's anything wrong with that. Who wouldn't want pizza and salad for dinner every night, I ask you?

Tonight's was a pretty basic version -- tomato sauce, goat cheese, mushrooms, basil and a bit of Parmesan on top. Click here, and here for other pizzas I've posted about.

Lately I've been using the pizza stone I've owned for about 20 years. I used it once or twice way back when, but the pizza stuck, so I stopped using it. Now, I just put the pizza on a cookie sheet directly on the stone so sticking is not a problem. It really does help crisp up the crust.

Every once in awhile I like salad with just lettuce. Period. Then I toss it first with olive oil, the vinegar, then salt and pepper.

But most of the time, I like to load up salad with lots of other healthy treats. Tonight's salad had: watercress, red leaf lettuce, left-over radish sprouts, left-over green beans, left-over basil leaves, and half a left-over half avocado --  aha, a pattern emerges!
 
We had really great peaches for dessert. The first of the season for us. Sprinkled with lime juice and sugar and left to macerate for just a bit while we ate dinner. So good -- they didn't need yogurt (which I sometimes thicken and put on top of fruit) or ice cream or anything.
 
I buy this frozen pizza dough at Central Market.

 
The dough starts out in a fairly small circle.


I try for a vaguely rectangular shape to fit my cookie sheet. Also, I use whole-wheat flour when I roll it out, so by the end of the process, I figure that the crust is half white and half whole-wheat.

Voila!


Friday, July 8, 2011

Dinner on a Warm Day: Pesto over Salmon & Green Salad with Strawberries


I wanted to try the Orangette Shortcut Basil Aioli recipe, but at the last minute made a healthy substitution and exchanged half the mayonnaise with half no-fat sour cream. Also, I couldn't resist adding more basil than the recipe called for, so my sauce was more sturdy and less creamy than it might have been. Nonetheless, it was full of basil, so was, by definition, delicious.

We piled the pesto with abandon over the salmon and the green beans (as well as over some brown rice and French bread for the next day's lunch).

I poached the salmon in the microwave, as I always do with any fish when I want it poached. I try to do that ahead of time so it can come to room temp or cool off for an hour or so  in the fridge. That way the pesto or cucumber sauce won't get all melty.

This sounds heretical, but I actually prefer cucumber sauce on salmon instead of pesto. Same ingredients -- sour cream, mayonnaise salt, pepper, and minced garlic -- and then a substitution of a generous amount of finely chopped cucumbers (salted, drained, rinsed, and squeezed dry) instead of basil. Stirred, not blended.

We had just a few strawberries still lingering in a carton, so those went into a salad, along with slivers of red onion and a handful of sunflower seeds, which it turns out, pack a lot of nutrition into their very small seeds -- is that why baseball players eat them constantly? (No, I don't think so either.)

Monday, July 4, 2011

Nothing Fancy -- Barbecued Chicken Sandwiches and Onion Rings


Dont' get me wrong. I love fancy food as much as the next person. But ever since we got a new bakery in our neighborhood, Pane d'Amore, we've been having lots of sandwiches for dinner on fresh panini rolls.

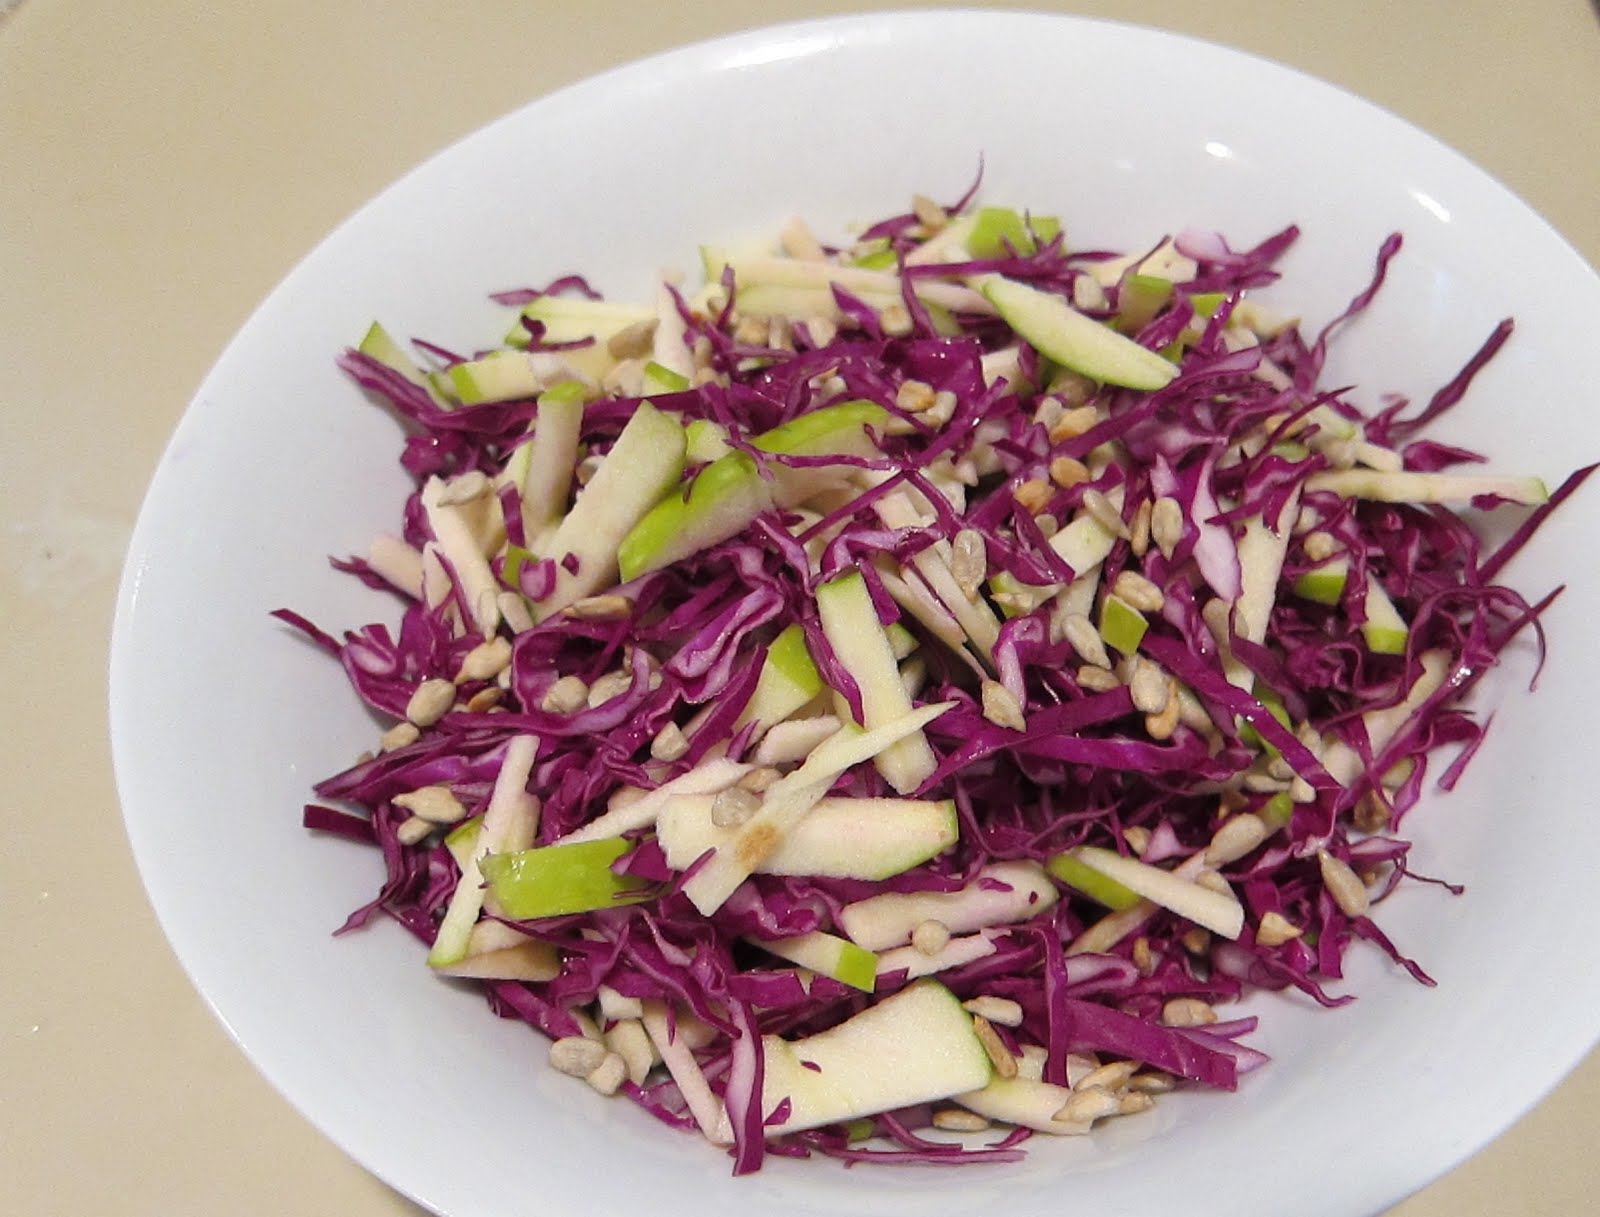
We also eat a fair amount of chicken breasts, and barbecued chicken sandwiches livens them up a bit. Last night we had the chicken sandwiches, red cabbage coleslaw with Granny Smith apples and Newman's Own Sesame-Ginger dressing, and oven-baked onion rings. Simple, but tasty -- perfect to eat while watching baseball on TV (Mariners won!).


Barbecue Sauce:

I like making my own barbecue sauce because it's so easy and I don't need an extra bottle taking space in the fridge. My sauce consists of ketchup, Worcestershire sauce and chili powder. If I leave out the Worcestershire and put in lemon juice, it becomes cocktail sauce. Last night I also added a bit of chipolte Tabasco sauce.


Oven-Baked Onion Rings: So fun to buy a giant onion!

Preheat the oven to 450 degrees.
 
Slice the onion rings about 1/4 inch thick.

Prepare 1) a plate with flour, 2) a bowl with a beaten egg or egg white (add cayenne pepper if you want), and 3) a plate with Panko bread crumbs.
 
Dip the onion rings first in flour, then in the eggs, then in the breadcrumbs, pressing the crumbs onto the onion rings.
 
Place the onion rings on a greased baking sheet.

Spray lightly with oil and bake for 10 minutes. Turn and bake for another 5 or 6 minutes or until golden-brown.  


Thursday, June 30, 2011

Chocolate Pudding Cake – When You Need a Chocolate Fix

There are a million and two recipes out there for a hot fudge or pudding cake. I’ve been using mine for over 10 years and its origins are long gone. If you are feeling in need of a chocolate fix, this is definitely worth a try. I'll admit that it's not the most attractive dessert out there, but it works for us.

I like this cake because:
1)   It’s easy to make. I don’t even use a mixer, just a wooden spoon.

2)   It’s very chocolatey. If you like a more mild chocolate taste (but why would you??) you might not like this one.

3)   I used to think it was relatively healthy because it has no fat whatsoever. But I think the abundance of sugar negates that lack of butter. (I know -- some of you might consider the lack of butter to be a negative in itself!)

4)   It’s really good with strawberries (or raspberries) on the side.

Chocolate Pudding Cake

1 cup flour (I use whole-wheat)
¾ cup sugar
3 Tbsp. unsweetened cocoa
2 tsp. baking powder
¼ tsp. salt
½ cup milk (I use soy)
1 tsp. vanilla
1 Cup brown sugar
3 Tbsp. cocoa
1 ½ cup hot water

1.       Combine the first five ingredients and mix well.

2.       Stir in the milk and vanilla.

3.       Spread the mixture into a greased a 9 inch square baking pan

4.       Combine the brown sugar and 3 tbsp. of cocoa. Sprinkle it over the batter.

5.       Pour the hot water over the batter. Do not stir.


6.       Bake for 40 minutes in a preheated 350 degree oven.

7.       Go ahead and take the cake out after 40 minutes, even if it doesn’t look done, because by the time it does look done, it will be overdone.


Saturday, June 11, 2011

Artichokes and Memories

When I was born, my parents gave up their small apartment in San Francisco and moved to the suburbs, along with thousands of other young couples who were able to buy homes with loans from the GI Bill. We lived in Daly City, on Stoneyford Drive, a stone’s throw from the San Francisco city border.

We traveled into San Francisco on a regular basis, to visit our Aunt Rose, who owned an apartment building that smelled of dust and old carpeting; to dentist appointments in an office off Union Square, where we sometimes got to feed the pigeons (a disgusting pastime that the city eventually  outlawed); to see Santa and the four-story high City of Paris Christmas tree in December; to Fisherman’s wharf for fresh crab that vendors plucked out of steamy vats on the sidewalk; and to Italian restaurants, such as San Remo's and Alioto's.
At lunch one day in Alioto's, my mother made me and my brother approach a table where Joe Di Maggio was sitting with some friends to ask him for his autograph. My brother remembers that Joe asked if we wanted our picture taken with him too, but we didn't have a camera. I remember Joe's kindly smile, but mostly I remember the crusty the sourdough bread on every table. We lost track of the autograph itself, although my brother thinks that my mother still has it somewhere. The incident occurred sometime between Joe's glory days  and the early 70's when Joe morphed into being Mr. Coffee.


Behind our house were miles and miles of artichoke fields – this was California, land of lush valleys and thriving agriculture. Later, probably when I was around 10, we would watch the bulldozers come and turn the fields into the iconic ticky-tacky houses from the folk song that Malvina Reynolds wrote for Pete Seeger in the early sixties.
When you grow up eating artichokes, you think nothing of the work needed for cooking and eating them. They seem natural, don’t you know. I don’t remember what we had with artichokes, maybe crab. But today when I buy them in the late spring, I have pasta, or shrimp or risotto. My “Flavor Bible” cookbook says they go well with butter, cream, garlic, lemon, Parmesan cheese and parsley – all ingredients that go well with pasta and risotto too.
Like everything else, today’s artichokes seem bigger than the ones I remember eating – almost a meal in themselves. Nonetheless, Don and I each had our own at dinner last night. We have them with a mound of mayonnaise for dipping, because that’s how I at them as a child. I recommend this method.
I have since had whole, grilled baby artichokes that are utterly delicious and I would recommend that method as well.
Here are the artichokes from last night:
First, cut off the stem. And then, cut about 1 1/2  inches down from the top of the artichoke.

Next, pick off, by-hand, about two to three layers of the small leaves around the bottom of the artichoke and re-cut the stem close to the base. Needless to say, perfection is unnecessary.

Cut the tips off of each leaf with a pair of scissors so you don't prick yourself when pulling off the leaves to eat them.
 
Wash the artichoke and place upside down on a steamer basket in a large pot with a fitted lid. Steam for 45 to 50 minutes. Test an outer leaf for doneness by pulling it off and tasting. Some cookbooks suggest putting lemon juice in the water to reduce discoloration, but I don't bother with that.

When you get to the point where you can't eat anymore, begin the process of taking off the choke part of the artichoke so you can get to the heart. I think I ate a few more leaves at this point before starting to disassemble the artichoke.

Lift off the top mass of leaves.

Keep lifting off the leaves until you see the thistles.

Cut the thistles off with your table knife and enjoy the heart with even more mayonnaise.